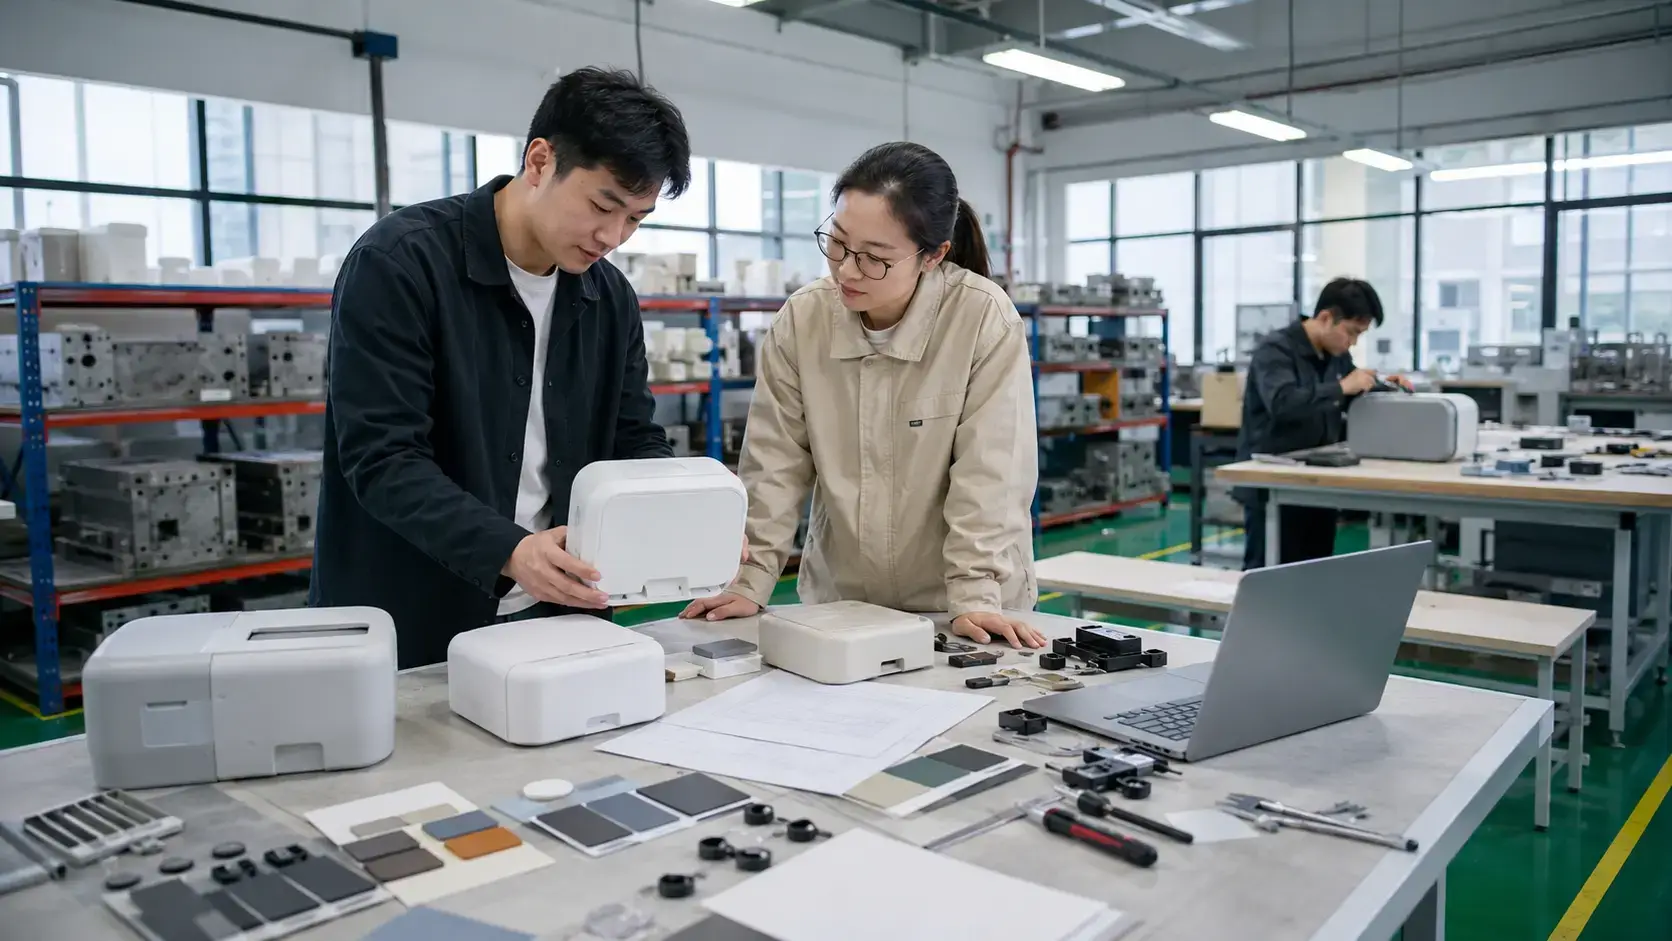
To develop samples in China, prepare a measurable product specification, choose a supplier with the right equipment, test each sample against written limits, record every revision, and approve a final sample before starting pilot production.
It sounds vague, or too theoretical to you? Do not worry. This blog aims at share specific, actionable information on how to make samples in China. You do not need professional background or plenty of experience to understand what comes next. We have been careful to keep things practical and anchored as possible. Have a great read ahead.
A sample is the material confirmation of design, materials, dimensions, function, finish, labels and packaging. As such, it is important to highlight that is in no way a proof of mass-production consistency by itself. A sample, also referred as “golden sample” comes as quality benchmark for the order you place with a Chinese vendor.
In this blog, we are going to go through the various stages of sample development in China. From specifications, to a prototype, and then to the “Golden Sample”, one of the most reliable ways to get your supplier to make the product as it needs to be for your market. The sample making process goes like this:
- Define the product and sales market.
- Prepare drawings, materials and test requirements.
- Check the supplier and production factory.
- Review the design before paying for tooling.
- Test each sample and record every correction.
- Approve the final revision in writing.
- Check a pilot batch before releasing the full order.
Buyers who need local support can use a structured product development service in China to get help with handling all stages listed above for a brand new product.
Now, on to the first stage of how to make a sample in China : the product profile.
Define the Product
A factory cannot develop an accurate sample from one photo and a short message. It may choose a different material, size, component, finish or assembly method that only takes costing into account and leaves safety, materials and ergonomy requirements out of the equation.
This is why the first step involves you, the buyer, writing a product brief, or product profile. It will be the cornerstone of your sample development project.
In case you can not fill some of the fields listed below, you can leave them blank, or contact suppliers that manufacture similar made in china products, and get the information from them.
- What the product is
- Who will use it
- Where it will be sold
- How it will be used
- Required size and weight
- Required materials and components
- Required functions
- Expected working conditions
- Target order quantity
- Target factory cost
- Required delivery date
For example, “waterproof backpack” is not a complete requirement. The supplier still needs to know the capacity, fabric type, coating, seam construction, zipper type, strap load, number of compartments, logo method, waterproof test and packaging method.
Describe the real use conditions. State whether the product will face water, sunlight, heat, cold, vibration, washing, chemicals, impact or repeated loading. A decorative item does not need the same controls as a children’s product, electrical device, food-contact product or load-bearing part.
Set Priorities
Separate requirements into three groups before requesting quotations:
| Group | Meaning | Examples |
|---|---|---|
| Required | Cannot change without written approval | Safety, legal requirements, fit, function and essential materials |
| Adjustable | May change after a cost or production review | Minor dimensions, construction details or finish options |
| Optional | Can be removed if it adds too much cost or time | Extra pockets, decorative parts or premium packaging |
This stops the supplier from changing an essential material or function to reach the target price. It also prevents optional details from delaying the entire project.
Separate the factory price from packaging, tooling, testing, inspection, freight and import costs. A low unit price may still produce a high landed cost if the packaging is large, the components require special shipping or the product needs repeated laboratory testing.
Build the Specification
The specification is the main document used to quote, make, inspect and approve the sample. It should contain enough detail for two qualified suppliers to understand the same product.
Depending on the product, include:
- Two-dimensional drawings
- Three-dimensional CAD files
- Dimensions and tolerances
- Material grades
- Bill of materials
- Approved component models
- Color references
- Surface finish
- Artwork and logo files
- Packaging drawings
- Performance requirements
- Test methods
- Pass and fail limits
- Labels, warnings and instructions
Avoid words such as “strong,” “premium,” “durable,” “smooth,” “heavy duty” or “high quality.” These words do not tell the factory what to measure.
| Unclear Requirement | Measurable Example |
|---|---|
| The handle must be strong. | The handle must hold a static load of 20 kg for 60 minutes without tearing, cracking or permanent deformation. |
| The parts must fit well. | The assembled gap must remain between 0.5 and 0.8 mm. |
| The product must have the correct weight. | Target weight: 500 g. Acceptable range: 485–515 g. |
| The color must match. | The color must match the approved physical swatch under a D65 light source or another agreed viewing condition. |
| The coating must resist corrosion. | The coating must pass the named corrosion test for the stated time without exceeding the agreed rust or blistering limit. |
These values are examples, not universal standards. Set the real limits according to the product design, expected use, customer requirements and applicable regulations.
Record the source of every important requirement. A dimension should refer to a named drawing revision. A component should include its manufacturer, model and rating. A physical color swatch should have an identification number, with matching approved copies held by the buyer and factory.
Set Tolerances
A dimension without a tolerance is incomplete. “Diameter: 20 mm” does not tell the factory whether 19.7 mm or 20.3 mm is acceptable.
A complete requirement may be written as:
Diameter: 20.00 ± 0.10 mm
Very tight tolerances can increase machining time, inspection work, tool wear, scrap and cost. Apply them only where the product needs them.
| Type | Effect | Example |
|---|---|---|
| Critical | Affects safety, fit or essential function | Shaft diameter, sealing surface or electrical clearance |
| Major | Affects assembly or normal use | Hole position or enclosure alignment |
| Minor | Mainly affects appearance | Hidden edge width |
Check the combined effect of several tolerances. Three parts may each pass their individual limits while the final assembly still fails. Identify the final fit or gap that matters, the dimensions that control it and the worst acceptable combination.
For a sample with a long or flexible feature, measure at more than one point. For example, check the thickness or width at the left, center and right rather than recording one convenient measurement.
For molded plastic parts, review shrinkage, wall thickness, draft angle, ribs, sink marks, warping, gate position and parting lines. For sewn products, allow for fabric stretch, cutting variation, stitching variation and washing shrinkage.
Choose the Sample Type
Different sample stages answer different questions. Ask which materials, tools, components and processes were used instead of relying only on the sample name.
| Sample Type | What It Can Confirm | What It Cannot Confirm |
|---|---|---|
| Reference sample | General size, feel and quality direction | Your final design or ownership |
| Appearance sample | Shape, color, texture and logo position | Strength, lifespan or internal construction |
| Functional sample | Basic operation, movement and fit | Final materials or production consistency |
| Engineering sample | Structure, components, firmware and performance | Stable mass-production output |
| Pre-production sample | Final design, materials, labels and packaging | Batch consistency by itself |
A functional sample may use 3D-printed, CNC-machined or handmade parts. It is useful for checking fit, movement, capacity, controls and basic operation before expensive production tooling is completed.
For CNC machining, 3D printing, sheet metal or low-volume trial parts, a controlled rapid prototyping process can identify design problems before production tooling is ordered.
The final pre-production sample should use final materials, components, colors, artwork, labels, packaging and production tooling wherever practical. Any difference from the planned bulk product should be listed in writing.
Plan Sample Rounds
One sample round is often not enough for a custom product. Use the following figures for early planning:
| Product Type | Typical Planning Range | Main Work |
|---|---|---|
| Existing catalog product | 1–2 rounds | Confirm quality, color, logo and packaging |
| Simple custom product | 2–3 rounds | Correct dimensions, materials and appearance |
| Custom bag or garment | 2–4 rounds | Adjust pattern, size, fabric, stitching and logo |
| New mechanical product | 3–5 rounds | Correct fit, tolerances, tooling and performance |
| New electronic product | 3–5 rounds or more | Correct hardware, firmware, enclosure and testing |
These are planning ranges rather than fixed rules. A complete and tested design may need fewer rounds. A project with incomplete drawings or changing requirements may need more.
Give every physical sample a unique number, such as S1, S2 or PPS-01. Never return feedback on “the latest sample” without identifying its exact number and document revision.
Screen the Supplier
A low quotation does not prove that the supplier has the machinery, engineers or quality controls required for the project.
Check whether the supplier has made products using similar materials, tolerances, processes and order volumes. A visually similar product may use a completely different internal structure or manufacturing method.
Request:
- Legal company name
- Business license
- Factory address
- Main products
- Production equipment
- Testing equipment
- Engineering staff
- Quality staff
- Monthly capacity
- Similar project examples
- Subcontracted processes
- Material control methods
The company sending the quotation may be a factory, trading company, sourcing company or factory-owned sales office. Any arrangement can work, but you need to know who controls the drawings, sample work, materials, production and quality.
Confirm:
- Which company will receive payment
- Where the sample will be made
- Where mass production will take place
- Who employs the engineer speaking with you
- Which operations will be subcontracted
- Who is responsible for subcontractor failures
When several factories must be compared, China sourcing services can help verify supplier identity, equipment, quotations and production capability.
For expensive tooling, complex products or an unverified supplier, conduct an on-site factory audit in China before paying a large deposit.
Compare Quotations
Send the same specification, quantity, material grade, packaging requirement, trade term, currency and delivery location to every supplier.
Ask each supplier to separate:
- Sample fee
- Engineering fee
- Tooling fee
- Material fee
- Packaging fee
- Testing fee
- Shipping fee
Also confirm:
- Sample quantity
- Lead time
- Number of revisions included
- Cost of extra revisions
- Mass-production price
- Minimum order quantity
- Production lead time
- Payment terms
- Tool life
- Tool ownership
- Quotation exclusions
If one quotation is much lower, find the difference. The supplier may have quoted a cheaper material, temporary component, manual finish, short-life mold or incomplete packaging. Testing, outside processing or engineering changes may also have been excluded.
Sample and tooling prices vary too much to use one fixed industry figure. A CNC prototype changes in price with material, size, tolerance, machine setup, surface finish and quantity. A plastic mold may be a simple single-cavity tool or a large multi-cavity mold with slides, inserts, complex cooling and polished surfaces.
Set Payment Stages
Avoid paying the full tooling cost before seeing a successful trial. For an important mold or special tool, payments can be linked to visible results.
| Stage | Example Payment | Required Evidence |
|---|---|---|
| Tool design approval | 30–50% | Final tool drawing, material and construction plan |
| First tool trial | 30–40% | Trial samples, photos, measurements and defect list |
| Final acceptance | Remaining balance | Approved sample and agreed corrections completed |
This is a commercial example, not a fixed rule used by every Chinese factory. The payment structure should match the tool value, supplier relationship and project risk.
Also budget for two or three international courier rounds. A sample that costs US$150 may create a much higher total development cost after repeated shipping, mold changes, new materials and laboratory retesting.
Protect Files and Tooling
Do not send every technical file to every supplier during the first quotation round. An early quotation may only require the overall size, main material, general construction, process and expected quantity.
Release detailed drawings, firmware, formulas and source files after the supplier has passed the required checks and the commercial terms are clear.
WIPO explains that trade-secret protection normally requires the owner to take reasonable steps to keep information confidential. These steps can include confidentiality agreements, access limits and controlled disclosure.[1]
Written terms may need to cover:
- Confidential information
- Permitted use of drawings
- Design ownership
- Approved subcontractors
- Unauthorized production
- Sale to third parties
- Return or deletion of files
- Ownership of modifications
Before paying for molds, dies, fixtures, gauges or printing plates, record:
- Exact tool identity
- Who owns it
- Who paid for it
- Where it will be stored
- Whether it may be used for other customers
- Who pays for maintenance
- Expected tool life
- Transfer conditions
- What happens when the project ends
“The buyer owns the mold” is not enough. The agreement should explain whether ownership includes inserts, gauges, fixtures and design files, and how the tool can be inspected, collected or moved.
Review Manufacturability
Hold a technical meeting before tooling or final sample production begins. Include the salesperson and the engineer or technician responsible for the sample.
Review:
- Product function
- Materials and components
- Critical dimensions
- Tolerance chains
- Surface finish
- Assembly method
- Artwork and packaging
- Test methods
- Timeline
- Open questions
Ask the engineer to explain how the product will be molded, machined, sewn, assembled, coated, programmed and tested.
A useful review should identify:
- Features that are difficult to make
- Dimensions likely to vary
- Areas likely to warp, crack or loosen
- Materials with long lead times
- Materials with high minimum orders
- Steps that rely on manual skill
- Required fixtures and gauges
- Features hidden after assembly
- Outside processing
For every issue, record the cause, proposed solution and effect on cost, appearance, performance, testing and lead time.
Control Revisions
Use a revision number for every drawing, specification, bill of materials, artwork file and sample.
A simple system is enough:
- Specification Rev A
- Drawing Rev B
- Sample S1
- Sample S2
- Pre-production sample PPS-01
Avoid filenames such as “final-new-2.pdf.” Use clear names such as:
- Housing_Drawing_RevA.pdf
- Housing_Drawing_RevB.pdf
- Housing_Drawing_RevC.pdf
| Revision | Change | Reason | Next Action |
|---|---|---|---|
| A | First issue | Initial design | Make prototype |
| B | Hole moved 2 mm | Assembly interference | Make new sample |
| C | Wall increased to 2.5 mm | Reduce warping | Modify tool insert |
ISO 10007 provides guidance on configuration management, including product-information control, change control and configuration records.[2]
Keep the current approved files in one controlled location. Chat messages may explain a change, but they should not be the only production instruction.
When a new revision is released, require the factory to remove old versions from the sample room, production office and subcontractor instructions.
Check Sample Progress
Do not wait until the finished sample is shipped. Set review points that match the product and manufacturing process.
For a molded product, review:
- 3D drawing
- Tool design
- First mold trial
- Surface correction
- Color trial
- Final sample
For electronics, review:
- Circuit design
- PCB layout
- First board assembly
- Firmware test
- Enclosure fit
- Full function test
Request clear photos, short videos, actual measurements, material labels, component labels and test records.
Remote evidence should show the sample number and revision. Measurement photos should show the measuring tool and measured feature. Test videos should show the setup, load, operating condition and final result.
Photos can identify large mistakes, but they cannot confirm hidden material grades, internal construction, lifespan or repeatable production quality.
Test the Sample
Create the acceptance test plan before the sample is made. The plan should state:
- Test item
- Purpose
- Sample quantity
- Equipment or fixture
- Test condition
- Number of cycles
- Pass and fail limit
- Whether the test is destructive
- Who performs the test
- Evidence required
Measure all critical dimensions and record actual values.
Required width: 120 ± 1 mm
Actual width: 122.4 mm
Result: Fail
Confirm the material type, grade, thickness, weight, hardness, coating and component model where relevant. A material certificate should match the batch used for the sample.
Inspect workmanship for scratches, dents, sharp edges, burrs, loose threads, uneven stitching, glue marks, gaps, poor printing, loose parts and contamination.
Test every function using a defined number of cycles. The following figures are practical examples rather than universal acceptance standards:
| Check | Example Test |
|---|---|
| Bag zipper | Open and close 20–50 times during initial sample review |
| Folding product | Complete 20–100 opening and folding cycles |
| Push button | Operate 100 times and check for sticking or damage |
| Package | Conduct multi-side drops from approximately 0.8–1.2 m when suitable for the package weight and shipping method |
| Critical thickness | Measure at no fewer than three selected positions |
| Color | Compare with the approved swatch under D65 or another agreed light source |
Durability tests may also include static loading, abrasion, water exposure, heat, cold, vibration, compression, battery runtime and connector insertion.
Record the complete test condition. For example:
Open and close the hinge 5,000 times at room temperature. The hinge must remain functional with no crack, loose pin or major increase in free movement.
When a sample fails, identify whether the cause is the design, material, component, manufacturing process or test method. Record the likely cause and correction before ordering another sample.
Check Product Compliance
Check compliance before the design is frozen. Requirements depend on the product, intended user, sales market, materials, power source, wireless functions, battery type and contact with food or skin.
A regulation, test standard, laboratory report, certificate, declaration and product mark are not the same thing.
Not every product sold in the European Union requires CE marking. CE marking applies only to products covered by relevant EU rules, and it does not mean that an EU authority approved the product as safe.[3]
Consumer products sold in the EU may also fall under Regulation (EU) 2023/988, the General Product Safety Regulation. It applies from December 13, 2024 and includes product safety, traceability, risk assessment, economic-operator and online-sales duties.[4]
For the United Kingdom, first identify whether the product will be sold in Great Britain or Northern Ireland. The correct CE, UKCA or UKNI route depends on the market and product sector.[5]
For products within the U.S. Consumer Product Safety Commission’s scope, identify the applicable safety rules, testing and certificate requirements. From July 8, 2026, importers of consumer products subject to CPSC certification requirements must electronically file the required certificate data, subject to the applicable rules and effective dates.[6]
Radio-frequency devices subject to FCC equipment authorization must meet the applicable technical requirements before importation or marketing in the United States.[7]
FDA requirements apply only when the product falls within an FDA-regulated category. Imported FDA-regulated products must meet the same applicable requirements as domestic products.[8]
Lithium cells and batteries may need testing under subsection 38.3 of the UN Manual of Tests and Criteria before transport. The current UNECE publication includes Revision 8 and its 2025 amendment.[9]
Create a controlled list for safety-related parts such as batteries, power adapters, wireless modules, plastics, coatings and protective devices. Record the manufacturer, model, grade and approved substitute. Review every proposed change before use.
Report Problems Clearly
“Please improve the quality” is not useful feedback. Give the supplier enough information to find and correct the problem.
A useful issue report includes:
- Issue number
- Photo or video
- Required result
- Actual result
- Defect level
- Correction required
- Responsible person
- Deadline
- Evidence needed for closure
Issue 04
Required opening width: 310 ± 3 mm
Actual width: 296 mm
Correction: Revise the pattern and submit a new measurement record before producing the next sample.
| Defect Level | Meaning | Example |
|---|---|---|
| Critical | Creates a safety hazard or legal failure | Exposed live wire or dangerous sharp edge |
| Major | Affects function, assembly, durability or normal sale | Product cannot assemble or motor cannot reach the required speed |
| Minor | Limited appearance or workmanship problem | Small cosmetic mark on a non-critical surface |
A feature that remains within the agreed acceptance limit is not a defect.
For repeated or serious failures, ask for the root cause. “Operator mistake” or “we will pay more attention” does not explain where the problem started, why it was not detected or how it will be prevented.
Approve the Final Sample
Approve the final pre-production sample in writing. It may also be called a golden sample, master sample, sealed sample or approved sample.
Where practical, keep two matching units:
- One with the buyer
- One with the factory
For higher-risk products, a third unit may be held by an inspection company or local representative. For large, expensive or destructive-test products, keep detailed measurements, photos, videos, material records and controlled component samples instead.
Label retained samples with:
- Product name
- Model number
- Revision
- Sample number
- Approval date
- Supplier name
The physical sample must be used with the drawings, bill of materials, test report, approved component list, color standard and packaging files. A sample alone cannot prove hidden material grades, internal components or firmware versions.
Use one of three written decisions:
- Approved: The named revision may move to the next stage.
- Conditionally approved: Only listed non-critical issues remain, with deadlines and closure evidence.
- Rejected: The sample must not be used to start production.
Close every safety, compliance, material, function and critical-fit problem before production begins.
Check the First Production Units
An approved sample proves that the supplier made one acceptable unit. It does not prove that the production line can repeat the result at the required speed.
For new tooling, electronics, tight tolerances, complex assembly or high-risk products, run a small pilot batch or inspect the first production units before releasing the full order.
| Product Risk | Example Pilot Quantity | Main Purpose |
|---|---|---|
| Simple product | 20–50 units | Check basic assembly, dimensions and workmanship |
| Multi-step assembly | 50–100 units | Check worker instructions, fixtures and process consistency |
| New electronics or tooling | 50–200 units | Check hardware, firmware, testing and repeated operation |
| Safety-related product | Set by product risk and compliance plan | Confirm critical controls and required testing |
These quantities are planning examples. The correct pilot size depends on product value, order size, process complexity and the cost of failure.
During the pilot run, check whether:
- Workers follow the approved instructions
- Fixtures hold parts consistently
- Cycle time matches the planned output
- Test stations can keep up with production
- Materials match the approved sources
- Defects increase after repeated operation
- Packaging damages the product
- Another shift can repeat the same process
A first-article or sample inspection can compare the first controlled units with the approved drawings, sample and test requirements.
Inspect Mass Production
After the first units pass, release the controlled revision for full production. Continue checking the order because materials, workers, machines and process settings can change.
A during-production inspection can identify wrong materials, assembly problems, workmanship defects and schedule delays while the factory still has time to correct the remaining goods.
During-production inspection is often useful when approximately 20–80% of the order has been made. The exact point should leave enough unfinished quantity for corrections to have a practical effect.
Before shipment, use a pre-shipment inspection to check quantity, workmanship, dimensions, function, labels, accessories, cartons and packaging.
ISO 2859-1:2026 defines acceptance-sampling plans indexed by the acceptance quality limit for lot-by-lot inspection by attributes.[10]
A common consumer-product inspection example is:
| Defect Type | Example AQL | Important Limit |
|---|---|---|
| Critical | Not accepted | Safety and legal defects require stricter control |
| Major | AQL 2.5 | Example only; adjust to product risk |
| Minor | AQL 4.0 | Example only; adjust to customer requirements |
AQL 2.5 and 4.0 are common purchasing examples, not automatic rules for every product. Safety, regulatory and critical functional points may require tighter limits or 100% testing.
For larger orders, ask the factory to keep:
- First-pass yield
- Rework quantity
- Main defect types
- Critical dimension records
- Functional-test pass rates
- Material batch numbers
- Test-equipment identification
- Critical process settings
Plan the Schedule
Sample lead time should start only after the factory has the required drawings, materials, payment and approvals. Confirm the starting point in writing.
| Activity | Planning Range |
|---|---|
| Existing catalog sample | 3–7 days |
| Custom logo or color sample | 7–15 days |
| Custom bag or garment sample | 10–25 days |
| Simple CNC prototype | 5–15 working days |
| Injection-molded first sample | 30–60 days |
| Simple electronic prototype | 30–90 days |
| International express shipping | 3–7 working days |
| Buyer review per round | 2–5 working days |
These figures are early planning ranges. Complex molds, special materials, custom electronics, laboratory testing, outside processing and major design changes can add several weeks.
Add time for:
- Material sourcing
- Tool design and manufacturing
- International shipping
- Buyer review
- Sample corrections
- Laboratory testing
- Component shortages
- Outside processing
- Chinese public holidays
For a new custom product, allow for at least two or three review rounds unless the product and manufacturing process are very simple.
A typical critical path is:
Drawing approval → material purchase → tooling → first sample → correction → testing → final approval → pilot production
Packaging artwork, instructions and regulatory labels can be prepared at the same time, but final printing should wait until the product size and compliance requirements are stable.
Before You Approve Production
A reliable China sample project needs more than one attractive unit. Give every sample a number, link it to the correct drawing and bill of materials, and record actual measurements instead of writing “passed.” Simple products may need 1–2 sample rounds, while new mechanical or electronic products may need 3–5 or more. For new tooling, inspect a pilot batch of roughly 20–100 units before releasing the full order, with a larger or risk-based quantity where failure is costly. Close all safety, material, function and critical-fit problems first. The approved sample, controlled files, pilot results and production records must all describe the same product.