Bicycle frame pre-shipment inspection
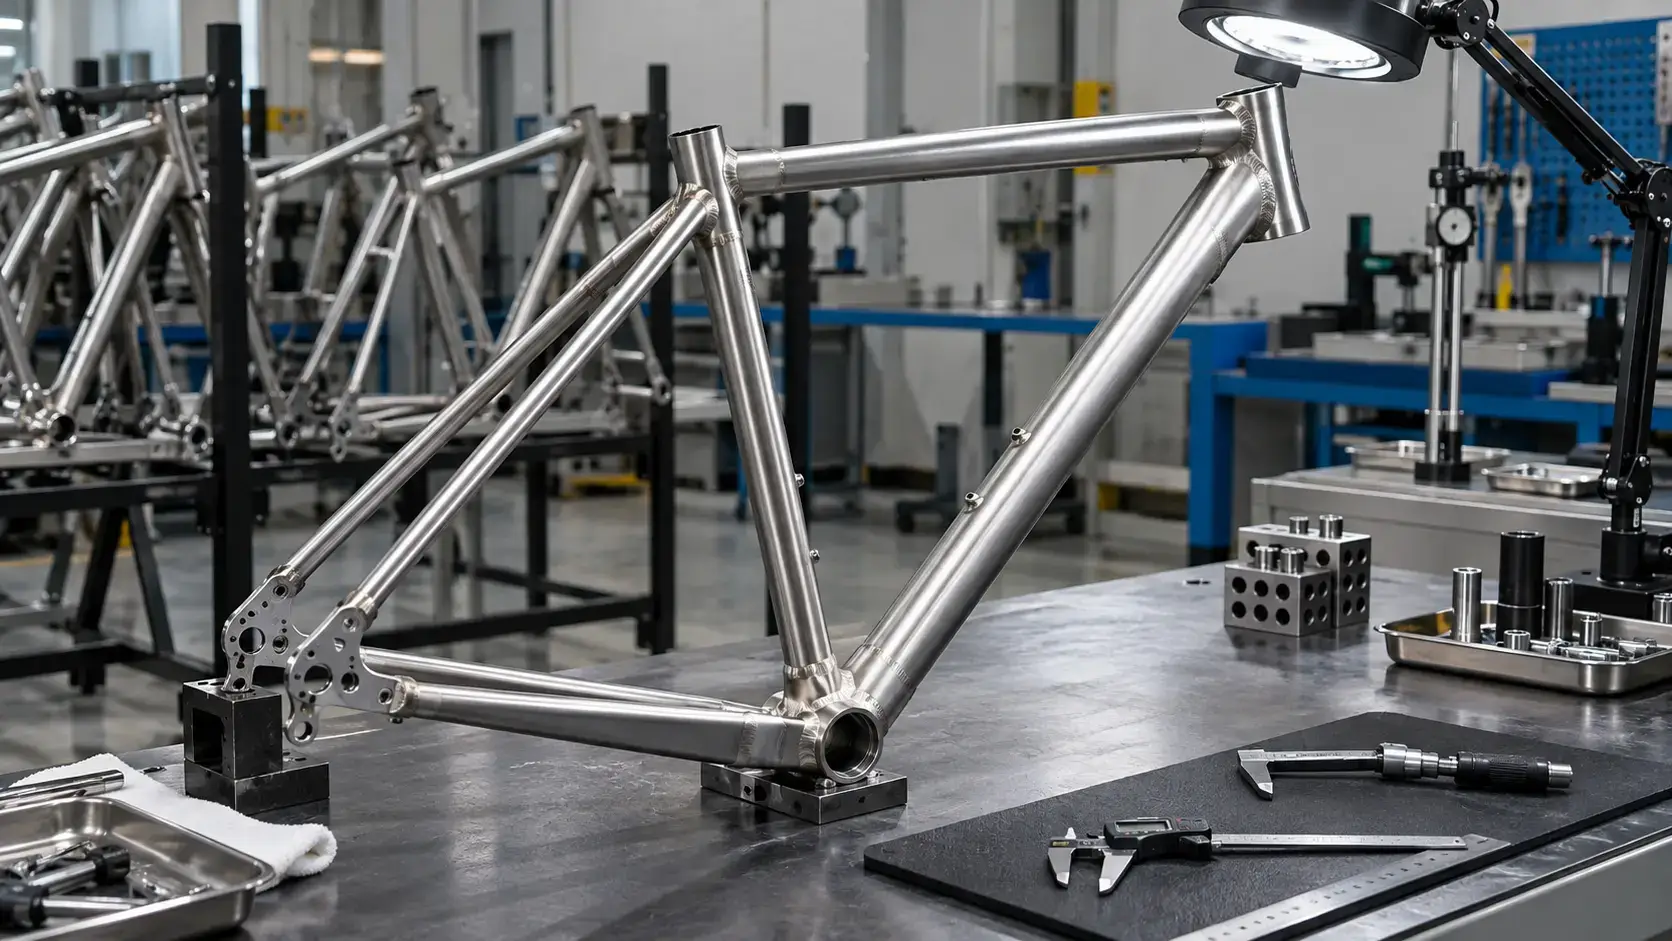
Before shipment, compare bicycle frames with the latest approved drawing and production sample. Check cracks and structural damage first. Then measure the geometry and assembly points that matter, including the headset, bottom bracket and rear axle. Hold the shipment if a structural issue is still open, a critical dimension is outside tolerance, or an approved component cannot be fitted normally. Record the actual measurements and defects. A simple “workmanship passed” note is not enough.
A frame can look clean and still create trouble on the assembly line. The rear triangle might be slightly out of line. A bearing seat can be too small. Paint may have filled part of a thread. Catch that at the factory and it may take a few minutes to fix. Find it after 1,000 frames reach an overseas warehouse and you have a sorting job.
When sourcing bicycle frames and components, agree on the inspection method before production starts. Any numerical example below that is not tied to a cited standard should be treated as an example only. The approved drawing and QC plan always take priority.
Inspect against the current drawing
Put the drawing revision directly on the inspection sheet. Do not let the inspector use whichever drawing happens to be open on the factory computer.
Check the purchase order too. An older revision may use another axle interface, cable-routing layout or bearing specification. Once the frame is painted, two versions can look almost the same.
Dimensions that affect assembly need clear numerical limits. “Head tube OK” tells the buyer very little.
For example, the drawing may specify a machined bore of 42.00 ± 0.05 mm. The acceptable range is therefore 41.95 to 42.05 mm. If three frames measure 41.98, 42.01 and 42.04 mm, write those numbers in the report.
The third result still passes, but it is getting close to the upper limit. That useful detail disappears if all three measurements are simply marked “PASS.”
Critical tolerances should already be agreed during product development and sample approval. If the buyer and factory are arguing about a dimension during final inspection, do not guess. Put that item on hold until the approved requirement is confirmed.
Check how much production is actually finished
Count the finished goods before choosing samples.
If the order is for 1,000 frames but only 680 are finished, your inspection says nothing about the other 320. They may be produced on another shift or after somebody changes a fixture, machine setting or paint process.
For a pre-shipment inspection, samples should come from normal finished production that is actually going into the shipment.
A welded frame waiting for heat treatment or paint is not finished. Neither is a painted frame that still needs its bearing seats machined.
If packaging is part of the inspection, finished cartons need to be available too. If they are not, the report should clearly say that packing was not fully checked.
Higher-risk orders often need an earlier inspection as well. Say a fixture shifts after 250 frames and another 400 are welded before anybody notices. Catching that during a during-production inspection can save a lot of later sorting and rework.
Set the sampling plan before inspection
ISO 2859-1:2026 provides sampling schemes indexed by Acceptance Quality Limit for lot-by-lot inspection by attributes.[1]
NIST describes lot acceptance sampling as taking a random sample and using the results to decide whether a lot should be accepted or rejected.[2]
Set the sampling plan before defects start appearing. Do not change the rules halfway through because the first sample looks likely to fail.
An AQL of 2.5 does not mean a factory is automatically allowed to ship exactly 2.5% defective goods. The sampling scheme also sets the sample quantity and the acceptance and rejection numbers.
You also do not need the same sample quantity for every inspection point.
Quick checks such as model, size marking and obvious surface damage can cover more frames. Detailed geometry and bore measurements take longer, so they may use a smaller defined sample.
For a new frame design, it can make sense to measure several units from every important size on top of the normal attribute sample. Five to ten pieces per key size may be useful when the order volume allows it, but that number should come from the project QC plan.
Take samples from different parts of the lot
The inspector should choose the frames, not the factory.
If the goods are already packed, open cartons from different pallets and different warehouse positions. Do not let every sample come from a neat group sitting next to the QC table.
Frame size matters too. Suppose an 800-frame order contains 100 S, 300 M, 250 L and 150 XL frames. If you inspect only M frames, you still have no useful dimensional evidence for the other three sizes.
Check the serial-number spread as well. Forty consecutive serial numbers may all come from the same short production period.
Record enough identification to find a sampled frame again. A frame number or carton number is much more useful than “Sample 6” when you later need to trace a dimensional problem.
Confirm the model before measuring it
Start with the model code and size.
Then check the axle system, brake interface and finish against the purchase order. Similar-looking frames can use different machined features underneath the same paint and graphics.
A 27.5-inch mountain-bike frame may look close to a 29-inch version at first glance. Road frames can also use different bottom-bracket or headset systems while looking nearly identical.
Serial numbers should be readable and match the factory records. If two duplicate numbers show up in a sample of 20 frames, check what happened in the numbering process before somebody simply replaces the labels.
If the specification calls for a particular alloy or material grade, verify it through the agreed records or test method. You cannot identify the material from the paint.
Use a consistent visual inspection setup
Give the inspector enough light to see fine surface lines around welds and tube junctions.
If the buyer has no existing lighting rule, an internal inspection level of about 800 to 1,000 lux at the working surface can give you a repeatable setup. More important, keep the conditions similar during the inspection. Moving between a bright office and a dark warehouse makes visual decisions inconsistent.
The viewing distance for cosmetic inspection should also be written into the QC plan. Around 30 to 50 cm can work as an internal general-view distance, followed by a closer look when something seems wrong.
Use the same inspection route on every frame.
One practical method is to start at the head tube and main triangle, turn the frame, inspect the rear triangle, and then check the functional interfaces.
That sounds basic, but it stops inspectors from repeatedly looking at easy surfaces while forgetting places such as the underside of the bottom bracket or the rear of a dropout.
Look for structural damage before cosmetic defects
Deal with a suspected crack before worrying about a paint scratch.
On a metal frame, look carefully around welds, the head tube, bottom bracket and dropouts. A thin line next to a weld should not automatically be dismissed as a paint mark.
Put the frame aside first. Take a clear photo while the original condition is still visible. Do that before anybody sands, polishes or touches up the area.
Dents also need an engineering requirement. A blanket rule such as “anything below 1 mm is acceptable” does not work well because tube thickness, tube shape and location all matter.
A shallow depression in a low-load area is not the same thing as a sharp crease beside the head tube. If the approved drawing or defect standard does not cover what you found, keep the frame on hold rather than inventing a limit during inspection.
Check welds against the approved production sample
A visual weld check cannot prove internal fusion or fatigue life. It can still show when production has changed in an obvious way.
Start with visible cracking. Then check for serious undercut, burn-through and unusual porosity.
Compare the overall weld profile with the approved production sample. Tiny differences between individual weld ripples matter less than the same unusual change appearing repeatedly at one joint.
For example, earlier frames may show a consistent bead while later serial numbers suddenly have a much narrower weld at the same junction. Record the affected serial range and, if available, the welding time.
On aluminum frames, pay close attention to the head-tube junction and bottom-bracket area. The seat cluster is worth checking carefully too.
For brazed steel frames, follow the joint around the tube as far as access allows. Do not skip the underside just because it is awkward to photograph.
Inspect carbon frames differently
Carbon frames need a slightly different approach. Start by comparing the finished frame with the approved sample and production specification.
Look first for visible cracks and exposed fiber. Then check for unusual depressions, bulges or molding changes around structural junctions.
Compare the left and right sides where the geometry should be similar. Sometimes a local ridge becomes obvious only when you look at the opposite side for reference.
Inspect drilled openings and bonded or molded-in interfaces closely. Bottom-bracket sleeves and dropouts are common examples.
A normal-looking surface does not prove the laminate underneath is sound. Internal delamination, voids or bonding problems may not be visible from the outside.
Tap testing should only be used when the method suits that frame design and the inspector has a known-good reference. Laminate thickness changes around a joint can change the sound even when there is no defect.
If the quality plan requires internal defect detection, use the specified non-destructive inspection method. Appearance alone is not enough.
Measure frame geometry with a fixture
Do not check alignment simply by standing behind the frame and looking through the rear triangle.
Use the current drawing and a suitable checking fixture.
The exact dimensions depend on the frame design. Rear axle position and rear-triangle alignment are common checks. Head-tube and bottom-bracket positions may also be critical.
| Inspection Point | Drawing Requirement | Frame A | Frame B | Frame C |
|---|---|---|---|---|
| Reference Dimension A | 450.0 ± 1.0 mm | 449.6 mm | 450.3 mm | 451.2 mm |
| Reference Dimension B | 70.0 ± 0.5 mm | 70.1 mm | 70.4 mm | 70.6 mm |
In this example, Frame C is outside both limits.
Do not look only at pass or fail. Watch which way the measurements are moving. A sequence such as 449.7, 449.9, 450.2, 450.5 and 450.8 mm still sits inside a 450.0 ± 1.0 mm tolerance, but the process is clearly drifting toward one side.
That does not automatically reject the lot. It does give the factory a good reason to check the fixture before later frames move outside the limit.
Never pull a dropout sideways just to make the reference axle fit. If you need force to line things up, stop and measure the frame in its free condition.
Match the measuring tool to the tolerance
The measuring tool needs to be good enough to tell a passing result from a failing one.
Suppose the full tolerance window is only 0.20 mm. A tool that displays in 0.1 mm steps tells you very little near the upper or lower limit.
For that example, a resolution around 0.02 mm gives much better visibility. That still does not solve everything. Repeatability, tool condition and the way the measurement is taken also matter.
Check the calibration or verification status when the measurement is being used to accept or reject the product.
ISO guidance on measurement traceability notes that measuring equipment should be calibrated or verified, identified and safeguarded when traceability is required or considered necessary for confidence in the results.[3]
And do not use damaged caliper jaws on a tight machined bore just because the screen still shows two decimal places.
Check the head tube as an assembly interface
Confirm the headset specification on the drawing before measuring the head tube.
Measure the required bearing seat or bore and look for burrs or damage around the machined edge.
Paint should not reduce a functional bearing seat unless coating in that area is specifically allowed by the approved design.
After measuring it, try a known-good reference bearing on selected frames. It should seat using the intended assembly method, without strange resistance or obvious looseness.
If several frames show the same poor fit, do not keep treating the bearing as the only test. Measure the interface and find out whether the problem is diameter, alignment or another machined feature.
Inspect the bottom-bracket interface
First confirm exactly which bottom-bracket system the frame uses.
For threaded shells, look closely at the thread entry. Damaged first turns or cross-threading can stop assembly even when most of the thread looks fine.
Check for paint, blasting media or other debris inside the finished thread.
Use the specified thread gauge when the inspection requires dimensional thread acceptance.
For a press-fit design, measure the bore against the drawing. If two bearing locations need to work together, correct diameters on their own do not prove those two positions are aligned.
After measuring, use an approved reference component on selected frames. It should fit with the normal assembly process. Do not force it in just to make the check pass.
Check the rear axle and derailleur hanger
Fit the approved axle through the finished frame.
A thru-axle should pass through the aligned interfaces and engage the thread normally. If you have to push the rear triangle sideways to get it through, something needs checking.
Inspect the thread start and seating surfaces too. A small machining burr or a thick patch of coating can be enough to cause trouble.
Check the derailleur hanger as a separate item. If the QC plan requires it, remove and reinstall the hanger on selected frames.
The hanger itself may be correct but still sit badly because paint or debris is trapped underneath it.
If a hanger is bent, record the failure before anybody straightens it. Rework should not erase the original inspection result.
Check small threads before they become a large rework job
Small threaded features do not look important until hundreds of frames have the same problem.
An order of 800 frames with six threaded accessory bosses on each frame contains 4,800 individual threaded locations.
Use the approved fastener on the selected samples. The first few turns should start cleanly by hand.
If the bolt binds immediately, stop and inspect the thread. Do not solve the problem by adding more torque.
If the same blocked thread keeps appearing, record which frames are affected. You can then compare those serial numbers with coating or machining records.
Use reference components for fit checks
Keep a controlled set of known-good components for inspection.
The exact set depends on the frame. A headset and axle cover two common interfaces. Add a bottom bracket or seat post when those areas are important to assembly.
Use the same reference components throughout the inspection. Record the part number if there is any chance of mixing similar versions.
A modified workshop part is not a reliable reference. For example, an old axle that somebody has ground down may fit an undersize interface and hide a real production problem.
Component fit checks are useful, but they should support dimensional inspection, not replace the dimensions on the drawing.
Use frame weight as a comparison check
Frame weight can reveal that something changed in production. The acceptance limit, however, should come from the approved product specification.
Compare the same frame size in the same condition. If the approved specification includes the hanger and axle, weigh production frames with the same hardware installed.
Suppose the approved specification for an M frame is 1,720 ± 50 g. A frame weighing 1,785 g sits outside that buyer-defined range and should be investigated.
Do not replace an approved weight tolerance with a made-up percentage rule.
An unusual weight does not automatically prove there is a structural defect. It may come from another component, extra coating, a material change or some other production difference. Compare it with the BOM and manufacturing records.
Keep cosmetic acceptance measurable
Use the approved production sample or defect standard as the visual reference.
Check visible customer-facing surfaces for scratches, chips and finish damage. Then look at places where the coating can interfere with assembly.
Paint inside a bearing seat is no longer just a cosmetic issue if the bearing will not fit. The same goes for coating inside a thread.
Compare decals and graphics with the approved artwork and model designation.
If decal position matters, give the inspector an actual dimension. “Looks centered” leaves too much room for guesswork.
For example, a requirement such as “logo centerline 35 ± 2 mm below the reference edge” can be checked with a ruler or simple template.
Trace repeated defects to the affected production group
When the same defect appears several times, stop treating each sampled frame as a separate case.
Start with the serial numbers and production time.
Imagine a frame fixture was adjusted at 9:00 and an alignment problem is later linked to frames produced after that change. If the line made about 35 frames per hour for five hours, roughly 175 frames become the first logical group to isolate.
That does not mean all 175 are bad. It simply gives the factory a defined batch to check instead of guessing.
Use other records if they are available. Welding station, machining fixture, material lot and production shift can all help narrow the affected range.
If the factory cannot show when the problem started, widen the inspection range. Do not assume the sampled failures are isolated.
Reinspect frames after rework
Keep the rework result separate from the original inspection result.
Suppose inspectors find coating inside a threaded boss on 24 frames and the factory cleans all 24.
Checking one repaired frame tells you nothing about the other 23.
Reinspect the affected quantity using the agreed method.
Structural rework needs tighter control. Rewelding, local heating, structural grinding or composite repair should only follow an approved engineering procedure where that repair is permitted.
Keep the original failure and the reinspection result in the record. A useful inspection report should show what failed, what the factory did and what happened when it was checked again.
Check the frame inside its final packaging
Open finished cartons from different parts of the shipment.
Look at where the frame touches the packaging and the other components. A derailleur hanger should not be carrying pressure from another part. Painted tubes should not be rubbing against loose metal accessories either.
Move the packed carton enough to see whether a hard accessory can reach the frame. Judge it by the actual contact risk, not by a random rule about how many millimeters an item is allowed to move.
Long frame sections need the support shown in the approved packaging design. A thin plastic bag may stop light surface rubbing, but it offers very little protection from a concentrated impact.
While the carton is open, compare the model and size printed outside with the frame inside.
The packaging should prevent damage from movement and surface contact during shipping. Use the same inserts, accessory positions and protection that were approved for normal production.
Record enough data to make a shipment decision
The inspection report should show both the order quantity and the amount of finished production actually available during inspection.
For dimensional checks, record the approved requirement beside the measured result. For defects, record how many were found and identify the samples involved.
| Inspection Item | Example Result |
|---|---|
| Order quantity | 1,000 frames |
| Finished quantity available | 1,000 frames |
| Sizes | S / M / L / XL |
| Frames checked for detailed geometry | 24 |
| Geometry results outside drawing tolerance | 2 |
| Frames used for component fit check | 12 |
| Abnormal component fit | 1 |
| Visible structural cracks | 0 |
| Repeated blocked-thread defect | 4 sampled frames |
| Finished cartons opened | 8 |
This gives the buyer something useful to investigate. If the two geometry failures came from the same size and the same production period, that tells you much more than a report that only says “FAIL.”
Use “Not Checked,” “Not Available” or “Pending” when that is the real situation. Never enter PASS for a test the inspector could not perform.
Keep pre-shipment inspection separate from structural testing
A pre-shipment inspection checks whether production matches the approved requirements. It does not prove the full structural life of a bicycle frame.
ISO 4210-2:2023 specifies safety and performance requirements for city and trekking, young adult, mountain and racing bicycles within its defined scope.[4] ISO 4210-6:2023 specifies frame and fork test methods used with ISO 4210-2.[5]
For bicycles subject to the applicable U.S. federal requirement, the fork and frame assembly test uses a load of 890 N (200 lbf) or at least 39.5 J (350 in-lb) of energy, whichever produces the greater force. The acceptance criteria include no visible fracture and no frame deformation that significantly limits steering. Sidewalk bicycles are exempt from this section.[6]
Do not copy those numbers into a PSI checklist and build an improvised test on the factory floor. Structural testing needs the correct fixture, loading method and test procedure.
Use this final release check
- Confirm the frame model, size and current approved drawing revision.
- Make sure samples came from finished goods intended for shipment.
- Hold any frame with an unresolved crack or structural concern.
- Measure critical geometry against the approved drawing limits.
- Check the main headset, bottom-bracket and axle interfaces.
- Use known-good reference components for fit checks where required.
- Trace repeated defects back to the affected production group.
- Reinspect repaired or reworked frames before release.
- Open finished cartons and check how the frame is protected.
- Mark anything that could not be inspected as pending or not checked.
FAQ
How many bicycle frames should be inspected before shipment?
Use the sampling plan agreed for the lot. ISO 2859-1:2026 can be used for attribute sampling, while geometry, fit and assembly checks may use different sample quantities in the QC plan. If several frame sizes are shipping together, make sure the relevant sizes are represented instead of pulling everything from the highest-volume model.
Should every bicycle frame be measured?
Usually not every dimension needs to be checked on every frame. Focus on dimensions that can stop assembly or affect alignment, then set the sample quantity according to risk. New tooling, a recent fixture adjustment or a history of dimensional problems are good reasons to increase the amount of measurement.
Can a frame pass if there is a small crack in the paint?
Only after you know the line is cosmetic. A suspicious mark near a weld, carbon junction or bonded interface should be isolated before anybody touches up the finish. If the approved defect standard does not clearly classify it, keep the frame on hold until the condition has been evaluated.
How should carbon bicycle frames be inspected?
Compare the frame with the approved production sample. Look for visible cracks, exposed fiber, unusual surface shape and problems around bonded or molded-in interfaces. A good-looking surface does not prove the internal laminate is sound. If internal defect detection is required, follow the non-destructive inspection method stated in the engineering or quality plan.
Does an AQL inspection guarantee that the shipment has no defective frames?
No. Acceptance sampling checks selected units and uses those results to make a decision about the lot. It is not the same as checking every frame. If the same serious defect appears repeatedly, isolate the likely production group and expand the inspection. Use 100% screening when the risk justifies it.
Finally
Release the shipment only when critical geometry meets the approved drawing, the main assembly interfaces fit as specified, and every structural concern has been closed. If the same defect appears more than once, find the affected production group instead of fixing only the sampled pieces. Reinspect anything that was reworked and open finished cartons before approval. Factory QC is not the last step if the frame can still arrive bent, scratched or damaged.
References
- ISO, ISO 2859-1:2026 — Sampling procedures for inspection by attributes — iso.org
- NIST/SEMATECH, e-Handbook of Statistical Methods — Lot acceptance sampling — itl.nist.gov
- ISO, Measurement traceability guidance — iso.org(链接待替换)
- ISO, ISO 4210-2:2023 — Safety requirements for bicycles — iso.org(链接待替换)
- ISO, ISO 4210-6:2023 — Frame and fork test methods — iso.org(链接待替换)
- U.S. eCFR, 16 CFR Part 1512 — Requirements for bicycles — ecfr.gov